See-Sip-Taste-Hear

WINE, FOOD, PHOTOGRAPHY, MUSIC

Sunday

Vegggies to eat before you die: Cauliflower with Anchovies and Garlic

If you love anchovies, this is the dish for you. We've been searching for new ways to cook some of our favorite veggies. The winter is coming and veggies can tend to get boring when you can't just go to the farmers market and pick up the best tasting freshest stuff. We had some leftover salted anchovies from Collin's birthday dinner so I decided to give this recipe a go. It is fabulous, and super easy.

1/2 head of cauliflower
2 anchovies packed in salt rinsed and diced
2 cloves of garlic minced
2-4 tbsp olive oil

1. Cut the cauliflower into large-ish pieces (to prevent over cooking and falling apart) and steam for about 20 minutes or until al dente.

2. In the meantime, cook garlic and anchovies in olive oil until anchovies begin to break down. I think this took about five minutes.

3. When the cauliflower is done, toss in the anchovy/garlic mixture. Salt and pepper to taste. You won't need to much salt thanks to the anchovies.

Labels: , , ,

Monday

Birthday Dinner: Clams in Tomato Broth and Caesar Salad with Homemade Dressing

Well, here I am, making a conscious effort to post more often. (Really, I have just been scrubbing down this salvaged table and I am trying to find something else "productive" to get me away from that mess.) So Collin had a birthday, one of those pesky mid-week birthdays, that makes it kind of tricky to celebrate. So in order to lighten the blow of him having to work on the 30th anniversary of the day of his birth, I made him dinner. I have been craving clams for a while, and since I was cooking, that's what we went with.

Clams in Tomato Broth
2 lbs of Little Neck Clams
2 lbs of Italian plum tomatoes peeled, seeded and chopped ( I cheated and used canned)
1 Tbsp Anchovies packed in salt, chopped
2 Tbsp Garlic chopped
2 Tbsp parsley chopped
Salt and pepper to taste
2 Tbsp cream
2 Tbsp Olive Oil


1. Soak the clams in cold water for 15 minutes to help remove sand
2. Place clams in a skillet over medium high heat and cook for 5 minutes. Discard any clams that do not open. Remove clams from skillet and reserve broth. (It's surprising how much liquid comes out of these clams)
3. Heat Olive oil, parsley, garlic, and anchovies in skillet over medium heat, stirring continuously for 5-7 minutes.
4. Add tomatoes, clams and broth and continue cooking for another 10 minutes.
5. Remove from heat and stir in cream.
6. Serve with slices of crusty bread (or linguine, like we did)

Caesar Dressing
1 Anchovy Fillet Chopped
2 Eggs
4 Tbsp Olive Oil
3/4 Cup Parmesan Cheese
1 Clove Garlic
Salt and Pepper to taste
1 Tbsp Lemon Juice

1. Cut garlic in half, rub around the inside of salad bowl and discard.
2. Bring a pot of water to a boil. Poke a small hole in the broad end of each egg. Drop into boiling water and let cook for 60-90 seconds. Remove immediately.
3. Crack eggs into garlic rubbed salad bowl,making sure to scrape out the whites on the inside of the shells. Beat eggs, slowly add in olive oil, anchovy, and lemon juice. Stir in Parmesan cheese salt and pepper to taste. I like lots of cracked pepper in the dressing.
4. Toss with lettuce and croutons if you like. Sprinkle more cheese over salad and serve immediately.

Personally, I think that Caesar dressing is to greasy, so I cut out quite a bit of the olive oil, just adding enough so that the dressing began to thicken up a bit and it was perfect.

The clams and dressing both turned out perfectly. It was one of the best meals that we have had in a long time and it got us super excited about cooking again. It's nice to have a decent selection of seafood at our finger tips here. It keeps that cooking morale high.

Labels:

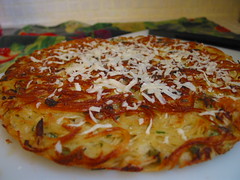
Herb & Cheese Angel Hair Fritatta

The other day we were craving a lite lunch that would be quick to prepare but also a lunch that was tasty & satisfying. I was struck by the memory of a recipe I read in Pasta Verde by Judith Barrett not too long ago. Carnivores beware this is a vegetarian cookbook & of course a meat free dish.

We have since given up our vegetarian experiment, but we still enjoy having many veggie meals. It is so easy to fall into a veggie-centric eating pattern this time of year, with the local produce being as fresh & delicious as it is. Plus, who really wants to be weighed down with a steak or any heavy meat dish in the middle of the day anyway?

Here is our version of the dish (adapted for two & using what we had on hand).
  • 6 oz. angel hair pasta

  • salt

  • 2 large eggs

  • 1/4 cup chopped fresh basil, chives & parsley

  • 4 oz. shredded fontina cheese

  • 1/4 cup finely minced onion

  • butter

  • olive oil

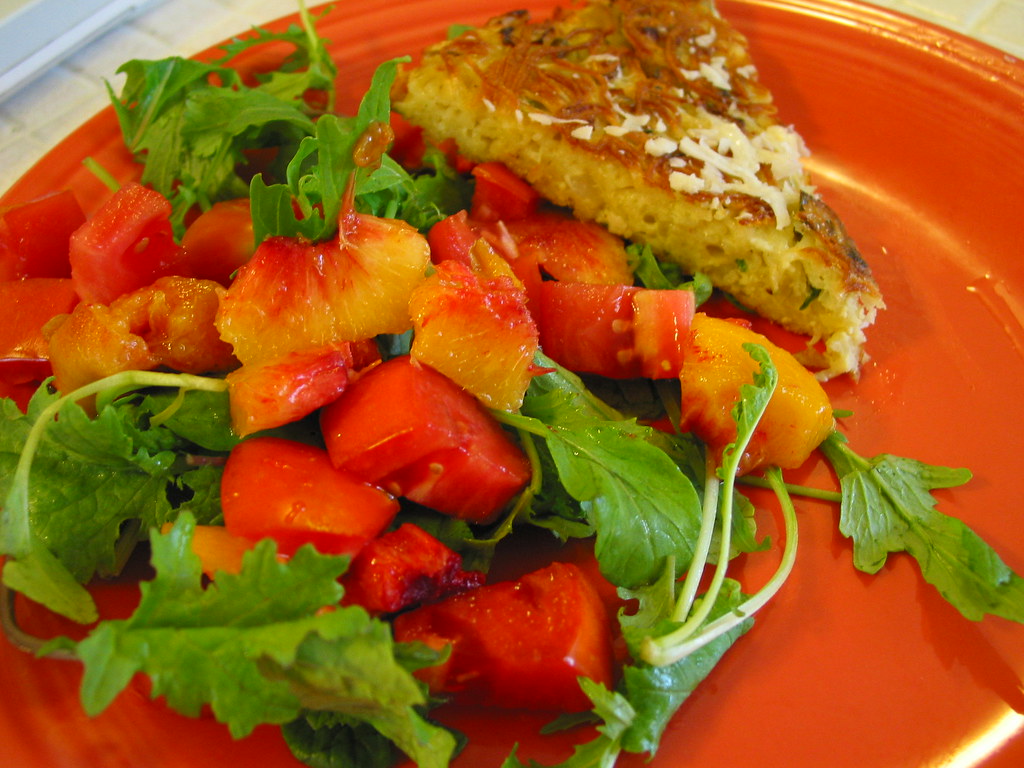
  • First boil your pasta in salted water until firm al dente. Drain & rinse with cold water. Lightly beat eggs then add cooked pasta, ,herbs & cheese. toss thoroughly. Heat oil & butter in frying pan until bubbling subsides & scoop pasta mixture into the pan & spread in an even layer. Cook for 10-15 minutes until bottom is golden brown & then flip & remove when the other side is done. garnish with shredded parmesan.

    We enjoyed this with a nice "farmers market" salad with mesclun, fresh peaches, tomatoes, & balsamic vinegar. As much as hate sauvignon blanc I have to admit this would go excellently with one, particularly a Bordeaux blanc, known for their assertive acidity.

    Labels:

    Wednesday

    Veggies to Eat Before You Die: Sauteed Zucchini Done Right

    Right now I should be packing for theNOWFE this weekend but we had another awesome veggie last night that I had to share before I disappear for a long weekend. We get the great magazine called Cook's Illustrated from Collin's Mom and it rocks. It reminds me a lot of Good Eats on FoodTV. It covers the in's and out's of all things cooking related, its highly informative and most of the pictures are hand drawn, hence the name Cook's Illustrated.

    Anyways, every time I read Cook's Illustrated I learn something new. Like why my zucchini turns out to be a soggy flavorless mess when I sauté it. Evidently zucchini is 95% water. On a grill, the water drains off, leaving you with highly condensed zucchini flavor. In a pan the water does not cook off and the zucchini turns into a flavorless soupy mess.

    Cook's Illustrated says that this can be avoided, so I had to give it a try.

    First thing you have to do is get as much of this water out of the zucchini (already tired of typing that word) as possible. To do this you either need to grate it by hand, or, if your in-laws rule and got you a brand-new bad-ass Cuisinart for your graduation from graduate school, you can use that to grate the zucchini in about 3 seconds. (If the zucchini is large and has large seeds, cut it in half and scrape out the seeds before you grate it.)

    Then you take that zucchini, you put it in a colander and you sprinkle salt on it. About 1.5 teaspoons for 10 cups of zucchini. Let it sit about ten minutes and then ring out the zucchini in batches in a kitchen towel. You would not believe the amount of water that comes out of that stuff. Now you are ready for the recipe.

    Sautéed Zucchini with Garlic and Lemon
  • 10 cups drained zucchini
  • couple of garlic cloves minced
  • olive oil
  • 1.5 teaspoons lemon juice
  • salt and pepper

    1. Toss the zucchini with the garlic and about 2 teaspoons of oil

    2. Add about 1 tablespoon of oil to the pan. when it starts to smoke, add the zucchini in a thin layer on the bottom of the pan with tongs. After the bottom layer has browned (about two minutes) stir the zucchini with tongs and allow the new bottom layer to brown (about 2 minutes).

    3. Remove from heat and add lemon juice, salt and pepper to taste.

    This zucchini was so flavorful. Still kind of mushy (I didn't use a high enough heat, or have the zucchini spread thin enough I think) but the flavor of the zucchini was rich and the browned bits were caramel-ly. I definitely see what I am supposed to be aiming for and I am definitely going to try it again. I give it three thumbs up. Way up.

    Labels:

  • Friday

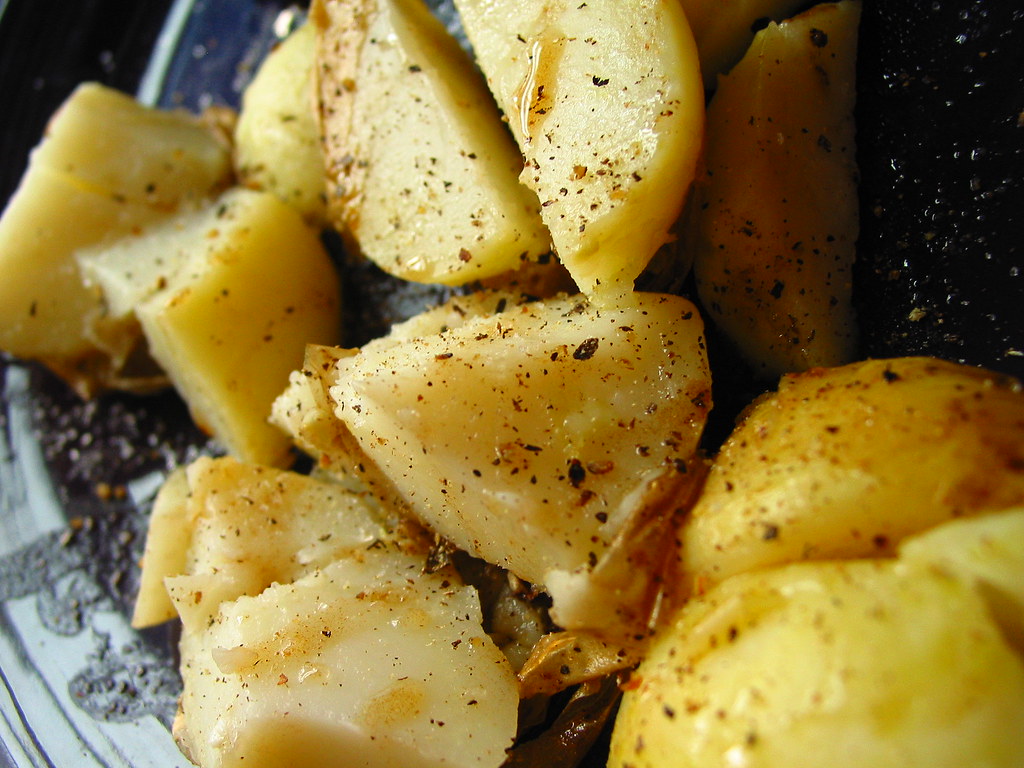
    Veggies To Eat Before You Die: Boiled Potatoes with Brown Butter

    I know I know I know what you are thinking. Boiled potatoes, Must eat? Yes, you must eat these potatoes before you die. We eat potatoes at least three times a week. That being said, every now and then potatoes get boring. Last night we decided to have potatoes, again. I was feeling lazy and didn't want to get in to mashed potatoes, which was ok with Collin because we didn't have everything I needed for the gravy. (Note to self, Please make chicken stock THIS weekend). So we decided on boiled potatoes, again.

    Now we have developed a new tradition of hanging out in the kitchen all the time. Most of the time we read cookbooks, because we are food geeks. Collin was going through one last night and mentioned something about using brown butter on veggies instead of plain ole raw butter. This got me excited. I love new twists on old side dishes. And thus a new veggie to eat before you die was born.

    You'll need-
    As many small waxy white potatoes as you think you can eat. About 1-1.5 inches in diameter.
    Water and salt for boiling
    Butter

    1. Boil the potatoes in liberally salted water until they can easily be pierced with a knife. (I can't for the life of me remember how long that took.)
    2. Drain the potatoes and return to pan
    3. Add as much butter as you would like to the pan and crank the heat up to about medium high.
    4. Stir continuously until butter begins to brown. Coat the potatoes with the butter.
    5. Dish the potatoes up, cut them open and drizzle with remaining browned butter.

    These potatoes were amazing. The butter was nutty, and almost had a caramel-y quality to it. The waxy potatoes were nice. (I hate that water logged mealy crap that you get when its hard to find those baby potatoes later in the summer.) And this dish was super easy. Nothing to it.

    Labels:

    Tuesday

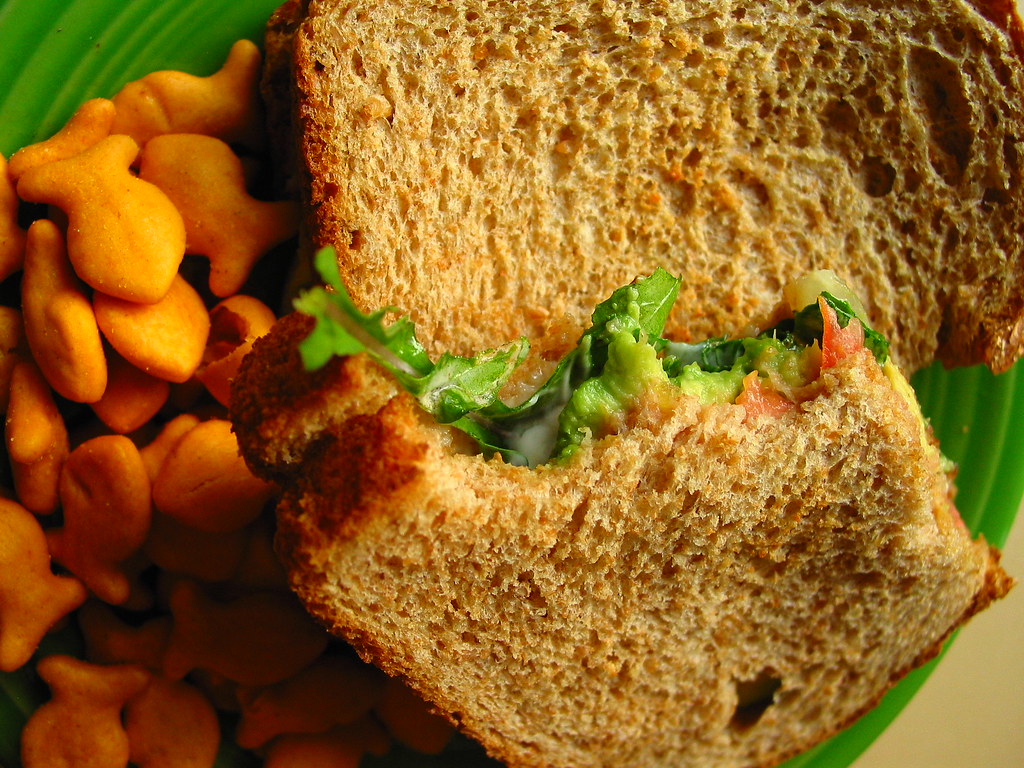
    Sandwich Night: Pseudo BLT's

    After a trip out east yesterday, we swung by Las Tortugas Deli Mexicana for a late lunch. Thanks a million Squirrel Squad, you make the best suggestions for good eats. Since we polished off a chorizo tortuga and elephant ear tacos around three in the afternoon, we weren't really feeling dinner. But I hate to wake up hungry so as it got later I started jonesin' for a snack. Thus Sandwich Night was born.

    We wanted BLT's but we didn't have all the BLT stuff and I just HAVE to spice everything up. Best part, the only dirty dishes were two knives and a cutting board. Sandwich Night, YOU RULE!!!!!!!!

    Pseudo-BLT Checklist
    -
    • Bacon
    • Arugula (home picked from our backyard plot of greens)
    • Tomato
    • Avocado
    • Caramelized vidalia onions
    • Mayo
    • Toasted whole wheat bread

    As far as direction for assembly are concerned, I'll let you use your imagination.

    Labels:

    Friday

    Weird Things I Eat for Breakfast #1

    Rice with scrambled eggs, fish sauce and mango salsa.

    We had a delicious pan fried Tilapia dish with some killer mango salsa (because right now, the mangoes at Viet Hoah market RULE!) And we had rice for dinner. And do you know why I love rice for dinner? Because it means leftover rice for breakfast. And I love rice for breakfast.

    I took a picture but it was pretty boring so I'll leave it to the imagination. The beauty of "weird things I eat for breakfast" posts is that no recipe is needed. Scramble your eggs, put em on top of the rice, fish sauce to taste (I like the fish sauce made especially for spring rolls, another Viet Hoah gem) and top with the leftover mango salsa that was an afterthought, but really pulls it all together. See, no real recipe needed. Unless you want the recipe for the salsa. FINE!

    Mango Salsa
    2 mangoes peeled and diced
    2 tbsp sweet onion diced finely (Schnucks has vadalias but they are looking kinda rough)
    juice of 1-2 limes
    cilantro to taste
    salt and pepper to taste
    (And I think Collin put vinegar in it this time because the limes weren't as acidic as we had hoped.)
    Mix it all together and eat it on your eggs.


    And just a heads up, I have started running again. The more I run, the weirder my breakfasts get so be prepared.

    Labels:

    Tuesday

    Carrot Orecchiette

    Un-Frickin'-Believable. This is a spin-off of a carrot orzo dish that I found in Bon Appetite. Since Schnucks only sells orzo in those ridiculously priced seven dollar containers (it's pasta for christ's sake) I opted for some orecchiette and tweaked the recipe to fit.

    Carrot Orecchiette
    6 oz carrots, peeled
    2 garlic cloves sliced
    2 tbl fresh rosemary chopped
    2 tbl butter
    1 cup chicken stock (homemade if you've got it, the dish is so much more rich with homemade)
    1/4 cup parmesan grated.
    10 oz orecchiette pasta
    3 tbl green onions chopped

    1. Start you water for pasta, salt it pretty generously. Cook pasta according to directions.
    2. Chop the carrots up pretty fine, see photos for guidance. ( I used my brand new cuisine art because I love it and it makes everything easier).
    3. Melt the butter in a saucepan, add the carrots, garlic and rosemary, sautéing until aromatic. Add the chicken stock. Let this reduce until only about 1/4 cup of the liquid remains.
    4.Toss carrot reduction with pasta and stir in cheese. Stir in green onions. Add extra stock if the "sauce" is too thick.

    This turned out sooooooo good. It's the best pasta dish that we have tried in a while. Super easy and full of flavor.
    We served it with braised bok choy and bacon, and Collin's fabulous Chicken Provençal.

    Labels:

    Sunday

    Recipe: Fried Chicken or KFC's got nothin' on me.

    I have been dying to try my hand at fried chicken for some time now. For some reason the thought of it has always been extremely intimidating. I found a recipe that didn't call for the use of lard or shortening (those two things still intimidate me) and it looked easy enough. So last night I decided to have an all out southern fried chicken dinner complete with mashed potatoes, giblet gravy, biscuits and brussel sprouts (not too terribly southern but so very good). It turned out absolutely perfect after I figured out how to maintain the oil heat for 25 minutes without burning the batter.


    Super Crispy Chicken

    One whole chicken cut into 8 pieces (drumsticks and thigh are preferable for this recipe so you could use those instead.)
    6 cups buttermilk
    3 cups all purpose flour
    salt, pepper and cayenne to taste
    vegetable oil for frying

    1. Toss chicken pieces with buttermilk, cover and refrigerate 8 hours or over night.
    2. Combine flour, salt, pepper and cayenne in a large ziploc. Place to wire racks over baking sheets. Working in batches drain buttermilk off chicken, trying to scrape off as much excess as possible. Place chicken in bag and toss until covered in flour. Transfer chicken to racks, pressing flour to help it stick to the chicken.
    3. Pour 1 inch of oil into a cast iron skillet or other pot with heavy bottom, and heat oil to 350º. Add as many pieces of chicken as you can without crowding the skillet. Fry over moderate heat until the chicken is crisp, golden and cooked through, about 20-25 minutes. Drumsticks and thighs should be 165º and breasts should be 160º. Drain chicken on paper towels and start a new batch keeping the oil at 325º during frying.
    4. Serve warm, or at room temp.

    I can see why fried chicken day was a treat for my mom when she was younger, this recipe takes a while. I finished the whole chicken in 3 batches which took about an hour and fifteen minutes, so you need time. You also need a cool house, I sweated through almost the whole process and don't think I will be preparing any fried chicken dinners in the dog days of summer. It was so worth the time and effort though. It is some of the best fried chicken we have ever had and the leftovers are phenomenal as well.

    Labels:

    Wednesday

    Veggies To Eat Before You Die: Cabbage Sprouts

    Spring time is here, yey yey yey. To celebrate I went to Easy Way (the only shop that I don't budget my spending) last weekend to see if they had any new seasonal veggies in yet. Most of the stuff on the shelves was still pushing it as far as being in season is concerned. They fooled me once this time of year with the melons about 4 years ago, but never again.

    So I am searching for the new stuff, the stuff they only have in the store for a couple of weeks before it is gone until the next season, and I stumble upon cabbage sprouts. They looked interesting enough, a mix between a tiny cabbage and a really big over grown brussel sprout and at 49 cents a pound they couldn't be beat. So I scoop some up, assuming that surely I will be able to find a recipe online when I get home.

    Well let me be the first to tell you that nobody eats these things. The things that I learned from my google search on cabbage sprout recipes are two fold.
    1. Only one person has ever eaten a cabbage sprout and felt the need to post about it on the internet besides me. (Although I was hungry and didn't do a thorough search.)
    2. Broccoli is Italian for cabbage sprout meaning every hit returned from my cabbage sprout search was ultimately about broccoli, which is not the same thing as a cabbage sprout.

    The recipe I found was simple enough, thanks to fellow blogger Alanna over at A Veggie Venture.
    -Melt some butter in a pan. (About a tablespoon)
    -Remove loose or tough leaves from cabbage sprouts.
    -Cut sprouts in half and place in pan with melted butter.
    -Toss well and cover pan. Cook slowly for about 20 minutes, stirring occasionally.

    We tried it out and the cabbage sprouts were phenomenal. They have more of a winter greens flavor (think Kale) than cabbage or brussel sprout flavor. I didn't really know what I was looking for in a cabbage sprout when I picked them out but since cooking them, I do know, and shall impart my sprout wisdom onto you.

    1. Pick tight sprouts, the outer leaves are kind of hard and the looser sprouts don't have as much of a "heart" as the tighter ones do. The heart is the good part, tender light green leaves full of flavor.

    2. Keep the butter on low heat. I ended up with a couple of kind of crispy leaves because of a thin pan and high heat.

    3. Leaves that you might think would be too tough to eat really turn out tender. The bigger tougher leaves fall off and burn rather quickly. They don't make for pretty presentation but still taste good and I think would be good sautéed in butter or oil separately from the hearts.

    Labels:

    Sunday

    Thera-pea

    To say that I don't handle stress well would be the understatement of the year. Because of this and my propensity towards procrastination in every aspect of my life, I have decided to make Sunday "Study Day" at least until I finish comprehensive finals mid-April. It helps me feel less like I am spiraling out of control into "cram session oblivion".

    Today (study day numero uno) I was dying for a break. As much as I love reading about the anthropology of health care, I figured that a hungry brain can't possibly function as well as a not-hungry brain, right?

    I needed something easy and quick, so that I didn't lose my motivation for actually completing my study goals for the day when I stumbled across this gem in my Health magazine. Generally I don't try recipes I find in Health. Too many light and low fat ingredients for my taste. Too much scrimping on flavor to save some calories, and frankly, if I never count another calorie again, it will be too soon. But this recipe looked so easy that even my text book-fried brain could carry it out.

    Anyways, rambling. So here goes. Don't blink because you seriously miss the recipe.

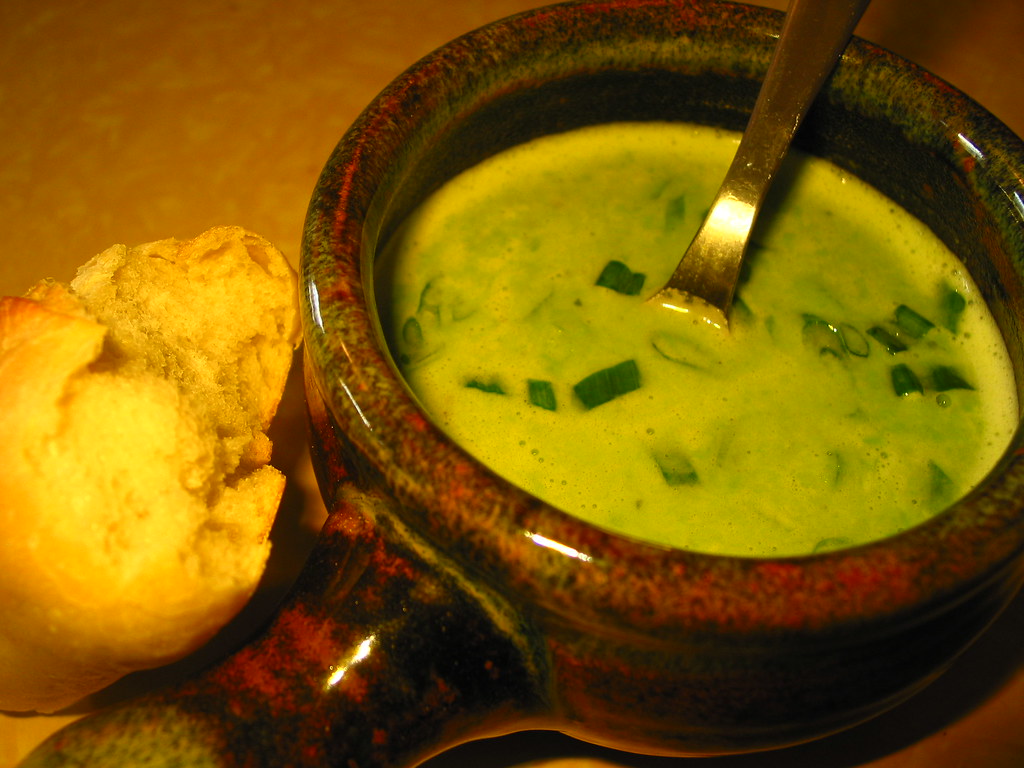
    Sweet Pea Soup
    2 cups chicken broth
    2 cups frozen peas (green peas)
    1/4 cup sour cream
    2 tblsp of chopped chives
    * I added garlic (because I eat everything with garlic) and tarragon to the broth while it was boiling (because it sounded kind of dull)
    1. Boil the broth (with other seasonings you want to add)
    2. Add peas and cook for about 3 minutes
    3. Take pea/broth mixture and put in blender with 1/4 cup of sour cream. Blend until smooth.
    4. Serve.

    That is it. It is a very thin soup, so don't go expecting hearty on this one, but the flavor is great, even with frozen and canned ingredients. According to Health, it's also really high in fiber, if you are into that sort of thing. We had it with some french bread and it was a fantastic light lunch. Definitely perfect for when you are in a crunch or in the middle of a cram session and don't want your meal to weigh your brain down.

    Labels:

    Wednesday

    MMMMmmmmmac and Cheese

    We have been slacking off in the "cook something new and then rave about it" department lately. Desperate for inspiration, I decided to spend a day perusing the Memphis food lover's blogs, my favorite spot for food inspiration. Not in the mood for anything too fancy or time consuming I stumbled upon this fabulous looking mac n cheese recipe courtesy of the squirrel squad from across the street.

    Being a cheese and pasta freak, I got super excited and ran into the kitchen, keeping my fingers crossed the whole time, hoping that I had everything I needed. I like to keep a fully stocked pantry because one of my BIGGEST peeves is having the cooking bug hit only to find that I have to make a run to the store for some ingredient that I forgot to restock.

    Of course, we were missing some key ingredients. Although we are huge cheese lovers, we are also semi lactose intolerant so we were in short supply of sour cream, and completely devoid of cream cheese. I recalled once making a mac n' cheese with a mornay base, so I went searching for a more precise recipe. While I can generally cook anything without a recipe and make it taste good, I will flub up a sauce in a heart beat.

    I found my mac n' cheese recipe in How to Cook Everything. This book has far more to offer in the way of technique than in actual recipe content IMO, but it has never let me down. One of this cookbook's biggest perks, I always have all the ingredients for almost all of the recipes on hand.


    Baked Macaroni and Cheese

    • 2.5 cups milk
    • 2 bay leaves
    • 1 lb of cut pasta (I used shells because shells are my favorite)
    • 4 tblsp butter
    • 3 tblsp flour
    • 1.5 cups grated cheese ( we used everything in the fridge: Brie, parm, port salute, and fontina)
    • .5 cup grated parm
    • salt and pepper to taste
    • .5 cups bread crumbs
    1. Preheat the oven to 400º F and bring a large pot of water to a boil.

    2. Cook milk with bay leaves over low heat until small bubble start to form on the sides of the pan, turn off heat and let stand. Salt boiling water and cook pasta to the point where it still needs a couple of minutes to be completely done. Drain, rinse in cold water to stop cooking and place in a bowl.

    3. In a small sauce pan over medium low heat melt butter. When it foams add the flour and cook, stirring constantly, until it begins to brown. (about 5 minutes) Remove bay leaves from milk and add milk, about .25 cups at a time to the flour mixture, stir between each addition until mixture becomes smooth. When you have added all the milk and the entire mixture is smooth, add the cheese (minus the .5 cup of parm), stirring until it melts.

    4. Pour the sauce over the noodles, toss in the reserved parm, salt and pepper. Grease a 9 x 13 inch baking pan and pour the noodle mixture in. Top with bread crumbs and bake until the crumbs turn brown, about 15 minutes.

    It turned out fan-frickin'-tastic. Even the left overs were delicious, and I have a hard time enjoying left over pasta of any sort. No pictures of this dish, we were starving and it tasted too good to wait for some stinking pictures. See Suirrel Squads recipe for a picture that looks identical to the turn out of our dish, or , a better idea, make it yourself and take your own photos.

    Labels:

    Lechon Asado Cubano: The Conclusion

    Once again Iraqi Zaqi has come & gone. All that is left from his R&R are fine memories of good times & good food. The Cuban Pork turned out better than expected & this was obvious by the (disappointing) lack of left overs. Even the whole piece of skin that was peeled off of the seven pound pork picnic shoulder was devoured by the end of the night.

    Instead of going on & on about how tasty it was, let me tell you how things went down.

    After marinating in the brine for 24 hours the next step was to marinate the swine in a heady paste of a whole head of garlic, cumin, dried oregano, salt, pepper, orange juice, white vinegar & olive oil. But before the pork got the rub down of garlic-citrus paste, I cut slits all over the shoulder & stuffed a couple of handfuls of whole garlic cloves, that I first smashed with the back of my hand, so they would release all of their succulent garlicky juices. The next 24 hours were tough but finally the time came to smoke pork.

    I smoked the shoulder using hickory wood for about 4 hours & then finished it in the oven for 2 hours at 300º. I am sure you could smoke the whole roast for the entire time. We ran out of wood but it turned out great anyway. Just make sure you cook it until a meat thermometer reads 190º in the thickest part of the meat.

    The only regret I have is not taking a picture because it was a thing of beauty.

    The wine list was as follows courtesy of Zach & I think Daniel brought a bottle or two also, 2003 E. Guigal Côtes du Rhône, 2001 Campo Viejo Reserva Rioja, 2004 Ventana Gewurtztraminer, 2001 Chateau Fonplégade Grand Cru St. Emillion, 2004 Domaine des Blaguer Syrah & when that was all gone we uncorked a magnum of 2004 Rosemount Shiraz. I can safely recommend every wine we had that night. They were all great wines but my favorites were the Côtes du Rhone, the Bordeaux & the Rioja. You can tell Zach grew up across the pond from all of his Old World selections & they were all fine specimens too.

    This is definitely a recipe to try again. We are just waiting for the right occasion to celebrate. Hey Zach, when do you get some more R&R?


    **side note**
    We have been in a blogging funk lately, but fear not, we are back in action. We had a good friend from Copenhagen, Denmark staying with us for two weeks after Zach left, so we have been playing tour guide & host but are now back to the ol' riga-ma-roe. So expect to see us posting more.

    Labels:

    Thursday

    Lechon Asado Brine

    We are about to embark on a 3 day journey to Ciudad de Lechon Asado or Cuban style pork-ville, if you prefer. This is for a dinner we are throwing in honor of my cousin Zach, who is in town from Iraq. The process started today with a brine consisting of orange juice, salt, sugar, one head of garlic, some bay leaf, whole allspice & black peppercorns. Our six pound 'picnic shoulder' will soak in this elixir for 24 hours after getting the once over with a pairing knife.

    Mañana will be phase two, where we will make a garlic citrus paste to rub into the hog & leave it again to soak it all up before finally smoking then roasting it on Saturday.

    Stay tuned, as we will be blogging about the experience as we go along. I can taste it already....I think this swine is going to whisk us away to Cuba or at least Little Havana on Calle Ocho.

    Labels:

    Saturday

    When the Moon Hits Your Eye Like a Big Pizza Pie, That's Amoré

    Well, It's official. We will never buy store bought pizza crust again. I have been experimenting with homemade pizza dough for quite some time now and think that I may have finally come close to perfecting my recipe. It still lacks in a couple of pizzeria qualities that I enjoy but it has turned out fluffy and golden every time I have used this recipe. The topping always differ. Pizza is usually a "clean out the crisper night" but the final results are always scrum-didly-umptous.


    Pizza Dough
    1 Packet instant or rapid rise yeast
    1-1 1/4 cup of water
    3 cups bread flour (about 14 oz.)
    1-2 tablespoons of olive oil
    2 teaspoons of corse kosher salt plus more for sprinkling
    chopped rosemary or other herbs to taste (optional but I think this makes the dough)


    I use plain old fashioned 'have to proof it yourself' yeast, why, because I like to challenge myself for no good reason whatsoever.
    So proof the yeast with a pinch of sugar and some very luke warm water (you don't want to kill it because that makes for some nasty dough.) I also make my dough with a stand mixer, because while I like a 'don't kill the yeast and ruin your dough' challenge, I don't enjoy a physical challenge so much. A stand mixer makes this so easy.

    Combine half of the flour with salt, yeast, 2 tablespoons of olive oil, and one cup of water in stand mixer, blend with machines paddle. With the machine on slow speed, add the flour a little at a time until the mixture has become a sticky ball that pulls away from the sides of the bowl. Kneed for a minute by hand adding as little flour as possible. Put in a bowl greased with olive oil and cover with plastic wrap or a dish towel and leave to rise in a warm, draft free place. I put mine in the oven (don't turn it on.....). This process will take about 1-2 hours.

    Meanwhile, preheat the oven as hot as you can get it. I can get mine up to about 575ºF. Most comercial ovens bake at about 700ºF. Heat is important in getting a good crunchy crust.

    Remove dough from resting place after it has doubled in size and kneed slightly. Push dough down and roll into a ball. Leave wrapped in plastic wrap or towel for 20 minutes or until it fluffs slightly.

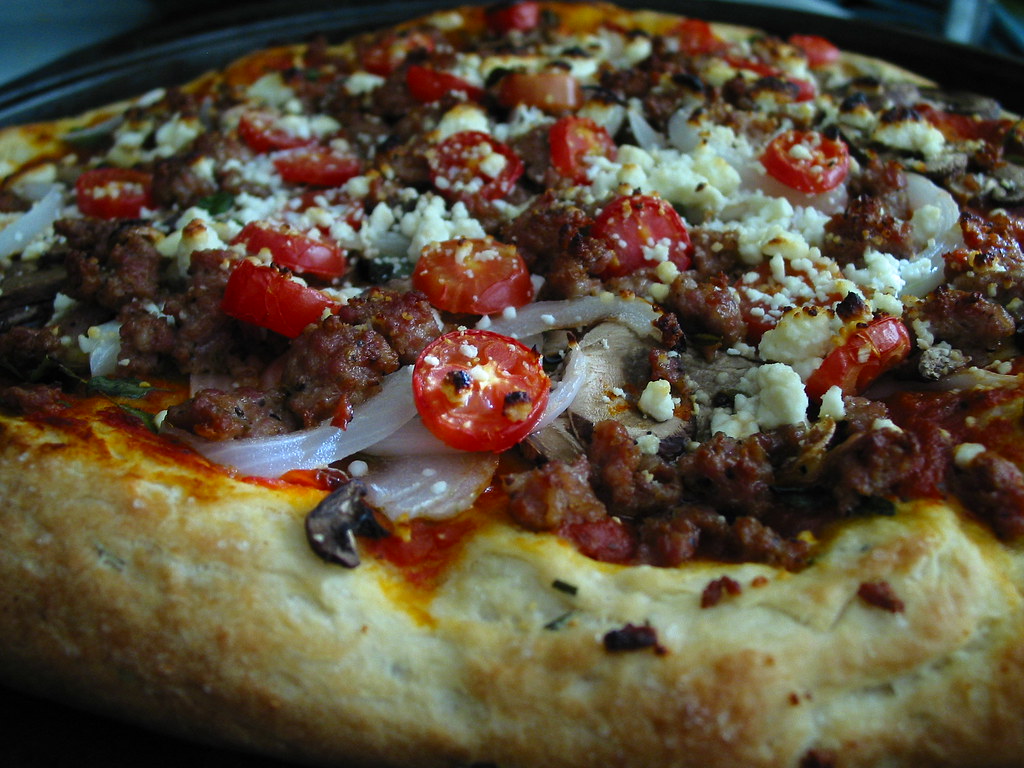
    Remove dough from wrap and place on pizza pan. I just spread the dough out with my hands to the edge of the tray making sure not to rip it. Holes in pizza dough isn't great, you lose a lot of valuable juices. Then I spray with olive oil over the crust and sprinkle it with salt and pepper. Top the pizza with anything you like (our pictured pizza has marinara, sausage, onion, tomatoes, oregano and basil and feta cheese on it), and put in the preheated oven for 12-15 minutes or until the crust looks done.

    Labels:

    Tuesday

    Recipe: Anise-Scented Short Ribs

    Well, It has been a long time coming, but this recipe is too good not to share. The key to getting a perfect, melt in your mouth experience with this recipe is to hit up the beef guy at the Memphis Farmers Market for your short ribs. Three bucks a pound (last time we were there) makes this a super affordable meal. This is a great cold, rainy day recipe because it stews for a couple of hours, which warms the house up nicely. And the smell, ahh the smell of slow cooked meat and anise, Glade Plug-Ins I scoff at you. You can also do this in a pressure cooker in a fraction of the time and have it turn out just as good. Just follow the rib cooking times on your machine.


    Anise-Scented Short Ribs
    Time: 2 hours or more, largely unattended

  • 1 Tbs Olive oil
  • 3 Pounds meaty beef short ribs
  • Freshly ground black pepper or szechwan peppercorns to taste*
  • 1 medium to large onion chopped
  • 5 nickel sized slices of fresh ginger or 2 teaspoons of ground**
  • 3 cloves of garlic lightly crushed
  • 5 whole star anise***
  • 1/4 cup of soy sauce or fish sauce
  • 1 cup water
  • 1 Tbsp rice or white wine vinegar
  • 2 Tbsp sugar
  • 2 Medium carrots, peeled and cut into 1/4 inch thick slices
  • Salt (optional)


  • 1. Heat oil over medium high heat in a dutch oven. Brown the short ribs well on all sides. Season with pepper as they cook. Don't rush the process, which will take about 20 minutes. Keep an eye on the heat so you don't burn the ribs or get the oil too smokey. You can also do the initial browning in a 500º F oven in a roasting pan turning the ribs every so often to get an even brown. This takes about 20 minutes as well.

    2. Remove the ribs with a slotted spoon and pour off most of the fat. Lower heat and cook onion until soft, about 5 minutes. Add garlic and ginger cooking for another 2 minutes. Add all remaining ingredients except carrots and salt. Bring to a boil and return ribs to the pot.Reduce the heat to low and cover. Cook slowly, occasionally turning the ribs, for about 1 hour.

    3. Add carrots and re-cover pot. Cook 30 minutes more until ribs are tender and meat is falling off the bone. Remove carrots and ribs from stew juices and place on a platter in a warm (200º F) oven. Discard the ginger and star anise pieces. Turn pot heat to high and reduce the liquid, stirring until thick and syrupy, about 10 minutes. Add more salt or soy sauce to taste. Serve sauce on ribs with white rice. I also like crusty bread to soak up the juice, but I am rather gluttonous when it comes to this recipe.

    *Szechwan peppercorns have a far superior flavor in this dish, use them if you can find them.
    ** Fresh ginger is easy to come by, use it over ground ginger, the flavor doesn't come close.
    *** Viet Hoah Market on Cleveland has the hook up on affordable star anise. They have the hook up on a lot of spices but that's for another post. you might be able to pick up some szechwan peppercorns there too.

    Recipe source: How to Cook Everything, Bittman

    Labels:

    Sunday

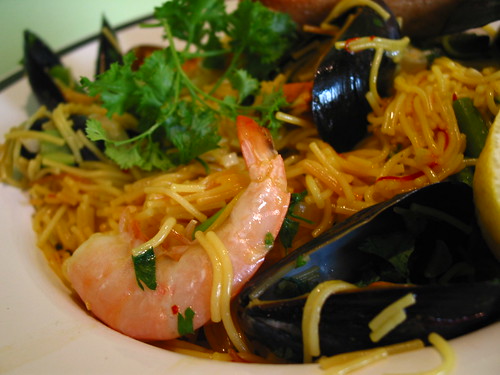
    Recipe: Seafood Pasta Paella

    Do you ever eat something that blows your mind & you have to have it again...soon. That was the case with this dish. The first time was on Friday night & then again the same weekend, even. Earlier in the day, on Friday, I picked up some Key West Pink Shrimp & a pound of mussels. The support for the fresh shell fish, thin spaghetti, saffron infused fish bouillon, asparagus, red peppers & lots of garlic & shallots. The makings for dinner time bliss.

    Paella is traditionally made with rice, so it makes since that pasta would be a good stand-in. The traditional pasta of choice is fideo noodles from Spain, but broken up thin spaghetti works just fine.

    We enjoyed this with a 2004 Protocolo Rose' & it was simply d-frikkin-lish. The wine choice was very fitting being a Spanish wine & Paella being a celebratory Spanish dish. It was a big, spicy, dry Rose' & suited the shellfish perfectly. It was also a steal at $6.99.

    Seafood Pasta Paella

    *this serves enough for 2 with leftovers.

    Olive oil
    12 ounces fideo noodles or broken up thin spaghetti (about 2"pieces)
    5 cloves of garlic
    1 shallot
    crushed red pepper to taste
    3 cups fish bouillon (or clam juice) diluted with one cup of H2O
    small pinch of saffron
    salt to taste
    handful chopped asparagus
    1/2 red pepper, diced
    1 lbs. of mussels
    1 pound of shrimp (peel 'em if you want...we didn't)
    any other seafood you see fit
    parsley

    Heat the oil in a dutch oven, over medium heat. Add pasta stirring constantly until brown, about 3-5 minutes. Add garlic & red pepper, stir about 30 sec. until aromatic. Soak saffron in liquid. Add liquid & bring to a boil. Season with S & P to taste. Add veggies. Cover & cook over medium heat until pasta is barely al dente. Add H2O if necessary. Add mussels cook for 4 mins. or until all mussels are open. Add shrimp, cook until pink,m then remove from heat immediately. Sprinkle with parsley & serve with a crust piece of bread to sop up all of the juicy goodness.
    VOILA!

    Labels:

    Thursday

    Last Nights Dinner: Chicken with Orange Pan Sauce

    Oh man, this was fabulous & besides that, it was quick & easy. We enjoyed it with rice with peas, grilled asparagus & grilled peppers. Add a bottle of 2004 Tortoise Creek Syrah & you have the makings for mid-week, dinner-time bliss.

    Here is how it went down....


  • 4 bone-in chicken breast halves with skin

  • 5 teaspoons ground cumin, divided

  • 4 tablespoons olive oil, divided

  • 4 garlic cloves, smashed

  • 1/2 cup chicken broth

  • 1/2 cup orange juice

  • 1/4 cup fresh lemon juice

  • 2 teaspoons grated orange peel

  • 1 1/2 teaspoons grated lemon peel

  • 1/3 cup chopped fresh cilantro


  • Preheat oven to 425°F. Slide fingertips beneath skin of each chicken breast to loosen. Sprinkle each chicken breast with 1 teaspoon cumin and salt and pepper; rub seasoning beneath and on top of skin.
    Heat 2 tablespoons oil in heavy large ovenproof skillet over medium-high heat. Place chicken, skin side down, in pan and cook until skin browns, about 5 minutes; turn chicken over. Place skillet in oven and roast until chicken is cooked through, about 15 minutes.
    Transfer chicken to plate. Add remaining oil to drippings in skillet; add garlic and sauté over medium-high heat 30 seconds. Add chicken broth, orange juice, lemon juice, orange peel, lemon peel, and remaining 1 teaspoon cumin; boil until reduced to 1 scant cup, about 3 minutes. Pour sauce over chicken; sprinkle with cilantro and serve.

    Makes 4 servings.


    Bon Appétit.

    Labels:

    Saturday

    Recipe: Chicken Satay, Shooting From The Hip

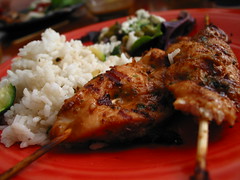
    Last week I needed a way to cook some chicken for dinner. I decided on Chicken Satay. We had this a few weeks ago but I couldn't find the recipe La used. La was in class & couldn't be bothered with an text message, IM, email or smoke signals (ain't technology great). So, I had to shoot from the hip.

    I know I could have gotten on Food TV.com or Epicurious.com but where is the adventure in that?

    I started some white rice while I made the Satay marinade/sauce, which I made to taste, so I have no quantities, but here is what I used...
  • peanutbutter

  • soy sauce

  • finely minced garlic

  • tobassco

  • five spice mix

  • 1 scallion chopped

  • cilantro

  • brown sugar

  • dash of fish sauce

  • some sesame oil & olive oil (more olive oil)


  • I mixed it all together & when it tasted to my liking, I pulled a little bit out to use as dipping sauce & I used the rest to marinate the chicken, for about an hour & a half.

    When the rice was done I let it sit with the lid on & I started the grill. While the coals were getting white hot, I rummaged through the crisper to find something else to grill, which happened to be a nice Zucchini. I sliced it & skewered it, along with the chicken & loaded it with sesame oil & five spice mix.

    I grilled both until they were done & by this point La was home & making a killer salad with herbed goat cheese, greens & pickled peppercorns. We also chopped the Zuke & tossed it with the rice, creating a duo worthy of seconds.

    I have never been to Thailand but I would like to think if you stopped at a Satay stall on the side of a moped & bike filled street this is how it would taste.

    If not, at least this meal whisked us away to a place we have never been.

    Labels:

    Tuesday

    Last Nights Dinner Brought To You By: Bacon & Mustard

    Sorry, no pics. I was flying solo because on Mondays La is in class until 5-ish. I was going to do cedar plank roasted salmon but decided to save that for another night (I really was just dragging ass, in my 24 hour Monday fog).

    Here was the menu...Mustard Greens (with bacon), Mustard Baked Salmon (with bacon) & Parsnip Puree'.

    I cooked the mustard greens in the pressure cooker & guess what....it didn't explode in my face like I was expecting. There was a few sketchy moments though, but I tamed the beast. Here is how it went down: I washed the greens & dried them in the salad spinner then threw them into the pot, along with 2 strips of bacon, 1 cup of H2O & a handful of mustard seeds (totally unnecessary thinking back, but the added occasional crunch & spicy explosion was nice). They cooked, hissed & threatened me while magically cooking in the pot of volatility for 5 minutes. They were cooked to perfection.

    For the salmon...I rubbed salt, white pepper & some whole grain brown mustard all over the fillet & then covered each piece with a strip of bacon & cooked in a 400° oven for about 12 minutes.

    To finish our Monday night dinner off I made a household favorite, Parsnip puree'.

    I got the original recipe from the Abstract Gourmet & it has slowly evolved into the creation we had last night. First, I cut the parsnips into small slices (<1/4 inch) along with a shallot. I then sauteed them both in some butter until they shallots were tender. After that, I de-glazed the pan with half a can of chicken stock & let it simmer with the lid on until most of the liquid was gone, when I then added some minced, fresh-from-the-garden Mexican Tarragon. Finally the puree' part comes in. I threw it in our blender & pureed the mixture (actually La was home at this point & she handled the blender quite skillfully, I might add since our blender is slowly dying). It might have been the best batch yet. The Mexican Tarragon made the dish with its sweet, lemony, fresh anise flavor.

    The wines poured were a Smoking Loon Viognier & I enjoyed the last glass of Luccarelli Primitivo. Both were good but the Primitivo paired better. The Viognier was just too delicate to stand up to the meal but was outstanding on its own. We have never tried a Viognier & we loved it. It was so delicate, floral & beautiful. We will definitely be trying more of this varietal. It is the first white wine to really make an impression on me.

    It was great way to end the worst day of the week...Monday.

    Labels:

     
    Creative Commons License
    This work is licensed under a Creative Commons Attribution-NonCommercial-NoDerivs 2.5 License.